Installing Prerequisites Without Admin Rights
Introduction
The prerequisites for the API are .NET and optionally Python. This page describes how to install these items on a locked down Windows PC without Administrator privileges.
Note that you don't need Admin rights to install the API itself.
.NET and .NET Core
- go to the dotnet scripts page
- download the PowerShell script
- open 'Windows PowerShell'
- change to the directory containing the downloaded script (e.g.
cd Downloads) - run this command
powershell -ExecutionPolicy AllSigned - run one of the following commands:
To install the latest long term support version of the SDK:.\dotnet-install.ps1
To install the .NET 5.0 SDK.\dotnet-install.ps1 -Channel 5.0
To install the .NET Core 3.1 SDK.\dotnet-install.ps1 -Channel 3.1
To install the .NET Core 3.1 Runtime.\dotnet-install.ps1 -Channel 3.1 -Runtime dotnet
At this stage, the dotnet command will work in this PowerShell session but
it won't work anywhere else. You need to add the %LOCALAPPDATA%\Microsoft\dotnet
directory to your path. See Changing Your Path below.
Git
If you want to use Git to clone the Oasys API Samples repository then you'll need to install that without admin rights too.
- go to the Git for Windows download page
- download the "64-bit Git for Windows Portable" version
- run the download to unpack it into a convenient directory
- add the 'bin' directory to your path. For example, if you unpacked Git into
c:\temp\gitthen you need to addc:\temp\git\binto your path. - open a command prompt and run
git --versionto confirm that it's installed
Python
- go to https://www.nuget.org/packages/python
- click the "Download package" link to download the Python .nupkg file
- rename the downloaded file and add .zip to end of file name
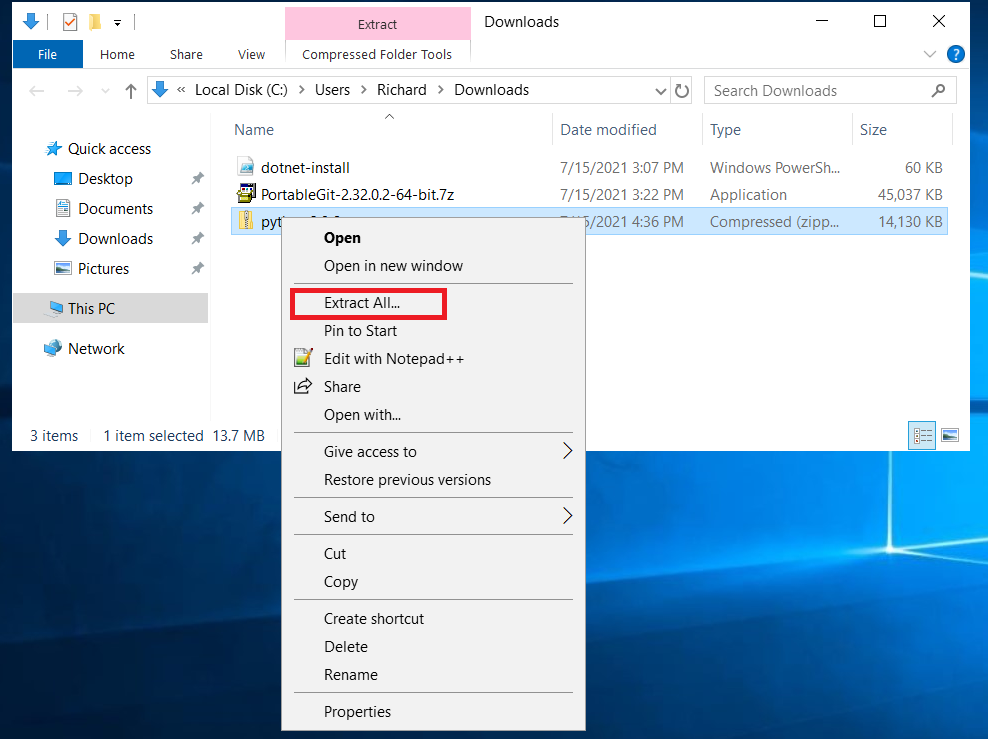
- right click on the .zip file and select "Extract All..."
- choose a suitable directory to unzip Python to. e.g. "Documents\python.3.9"
- add the "tools" sub-directory to your path

Changing Your Path
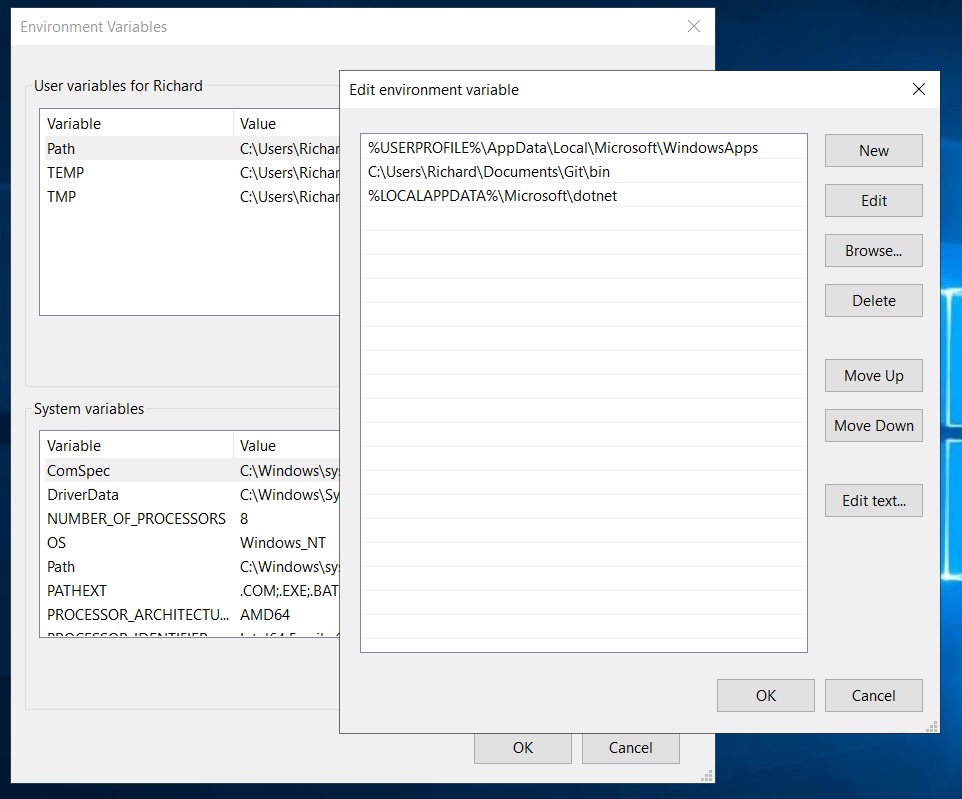
- open Windows search and start typing "Edit environment variables for your account"
- open the "Edit environment variables for your account" applet
- double click "Path" in the box at the top of the window
- double click on a blank row to add a directory to your path
- enter the directory name
- click Ok to close the "Path" dialog
- click Ok to close the "Environment Variables" window. (Cancel will abandon your changes)

Note
Applications such as "Command Prompt" won't see the new path unless you close and re-open them.