Jira Cloud Next-gen Project Setup Guide
This doc runs through a minimum setup for Next-gen project to work with Arup Issue Tracker. To increase userbase by simplifying Jira configuration, Atlassian has launched the Next-gen project last year on Jira Cloud (as opposed to Classic project). As it makes our lives easier (for both end-users and Jira project admins), we should be aiming to use it wherever it suits. Now you can DIY an Arup Issue Tracker compliant project on Jira Cloud w/o logging an IT ticket. A couple of quick facts about “Next gen”:
- It’s more like Trello. More user friendly and easier to use.
- It’s also easier to create and configure projects. Project settings are isolated among projects. Jira Project Lead can tweak their projects without System Admin’s help.
- It’s a trade-off between usability and functionality. There is limitation though Atlassian is adding more and more functions from “Classic” to “Next-gen”.
In a nutshell, Next-gen is recommended for most use cases. However, this is NOT a lesson 101 tutorial for Next-gen. Please look through the references below for detailed usage before creating a Next-gen project. If not, it should be fairly straightforward if you are an active Jira user. As a side note, Next-gen project is only available on Jira Cloud (https://ovearup.atlassian.net). Our internal Jira Server (http://jira.arup.com) doesn’t have this functionality. The logins are different.
Next-gen Project References
Classic vs. Next-gen Comparison
Access to Jira Cloud (Atlassian Cloud)
Note that the following actions are separate things:
-
Create a Jira Cloud account
If you haven’t got a Jira Cloud account or you want to create accounts for external users, please go to Jira Self Service Portal (Arup staffs only).
-
Create a Next-gen projet
You can do this once you have a Jira Cloud account. Look at the step 2 and 3 below.
-
Add existing Jira Cloud users to a Next-gen project
You can do this in Project Settings > People.
Set up a Next-gen Project for Arup Issue Tracker
Step 1: Install the latest Arup Issue Tracker
Download Installer (2019.7.15.1)
Please also make sure you have upgraded to Windows 10 and your Internet Explorer is up to date.

Step 2: Create a Next-gen Project on Jira Cloud
Go to Projects > Create project on the top right > Try a next-gen project.

Step 3: Choose Template, Project Name, Project Key, and Access Level
- Select a Next-gen project template. It’s recommended to use Kanban for common issue tracking or task management.
- Input a project name. It’s recommended to have job number as prefix, e.g., 123456-78 My Own Project.
- Expand Advanced and change auto-generated project key to something makes sense, such as project acronym.
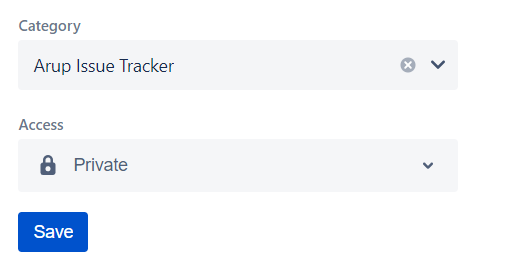
- Change Access to Private. This ensures confidentiality as we’ve got lots of external users. If your project access level is not set to Private, our Jira system automation program running on a daily basis will make the change for you.

Step 4: Create a GUID Field for Every Issue Type
This is the most important step. You can create as many issue types as you want in Project Settings. Just remember to add the GUID field to every issue type and Save Changes afterwards. If you haven’t created a Text field called GUID in a project, please create one from the right panel and then drag/drop it into either Primary Fields or Secondary Fields for each issue type.

Step 5: Change Project Category
For better usage tracking, it’s also recommended to change Project Category to Arup Issue Tracker. You can change this via Project Settings > Details > Category